This guide covers steps on how administrators can setup assessment plans and monitor EPA Assessment submissions using Entrada. Should you have any enquiries beyond this user guide, please submit via Entrada Request Form.
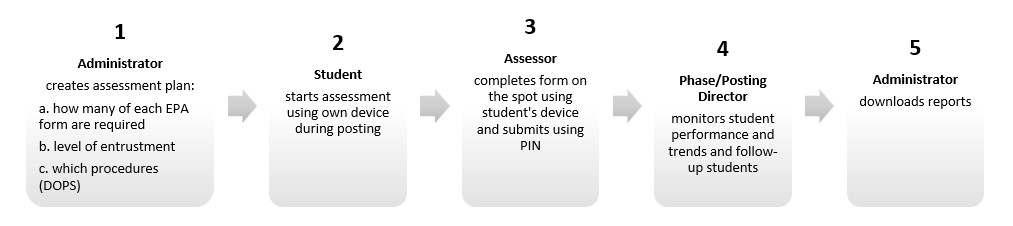
General Workflow
Roles and Interfaces
Below are the two administrator-specific interfaces for the purpose of EPA assessments, and you need to be familiar with them to know which interface to use.
|
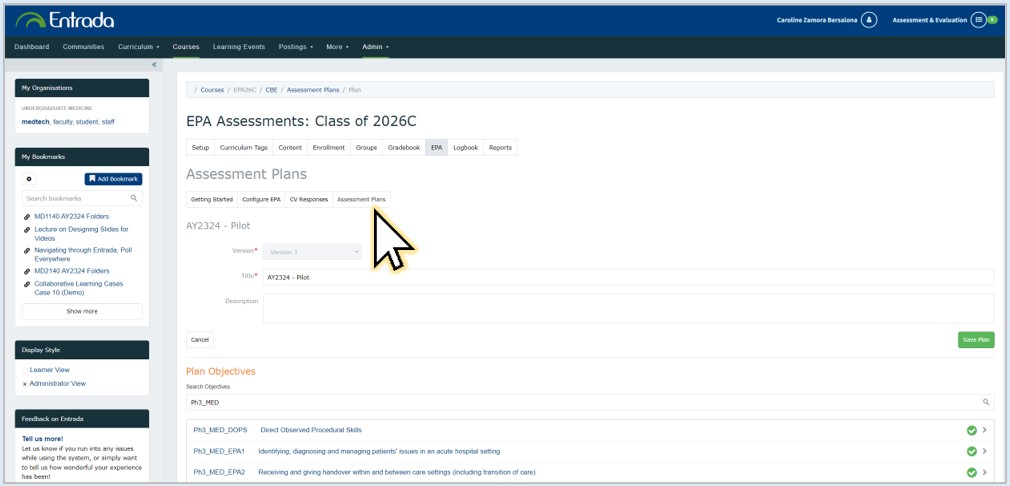
1) Manage Course > EPA > Assessment Plans This is for administrators to create the form requirements for each phase/posting
|
|
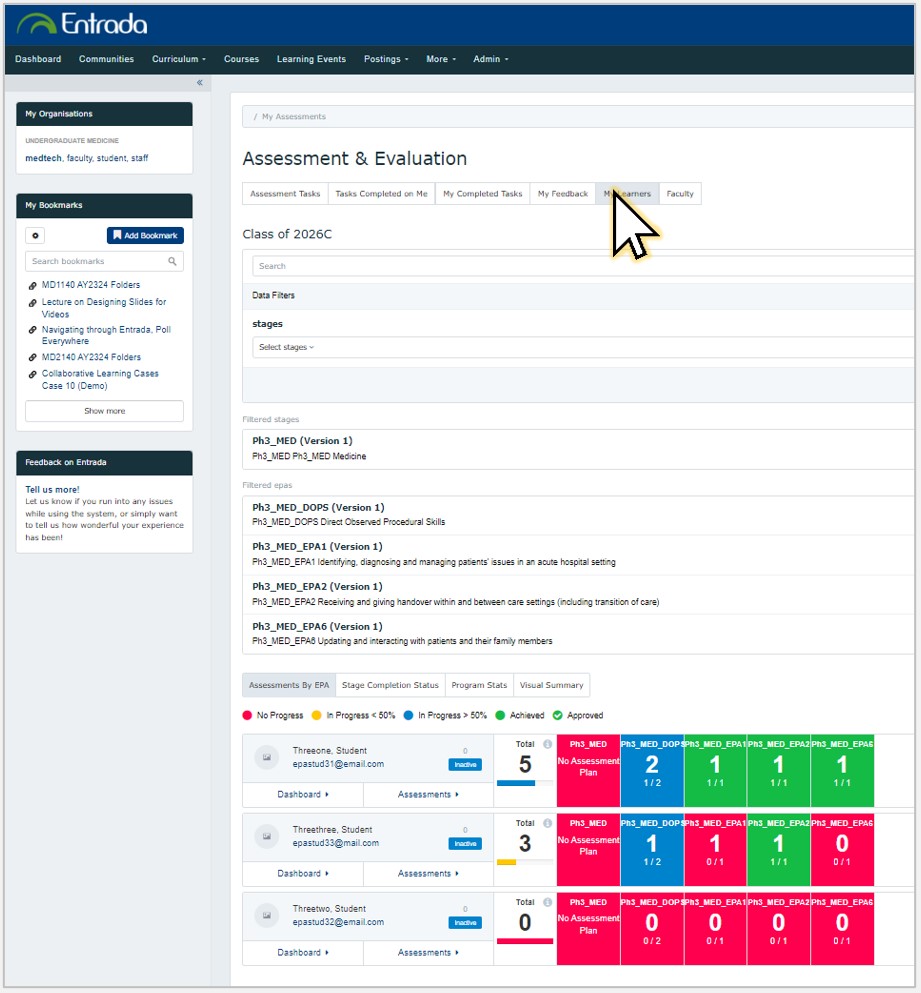
2) Assessment & Evaluation > My Learners This is for administrators, phase directors, posting directors, and FAC director to monitor the completion and analyse the results of EPA assessment forms.
|
1. Create Assessment Plan for a Phase and Posting
1. Go to NUSMed Entrada
2. Click Log In.
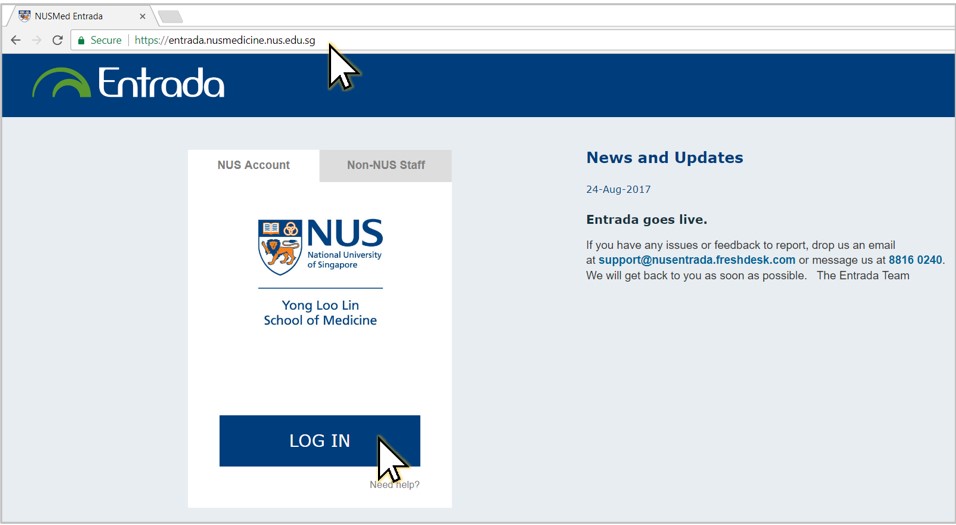
Note: If you have a local account, click Non-NUS Staff tab and login with your username and password.
If you do not have Entrada account, please write to support@nusentrada.freshdesk.com
3. Sign in with your NUSNET ID, e.g. nusstf\userid and password.

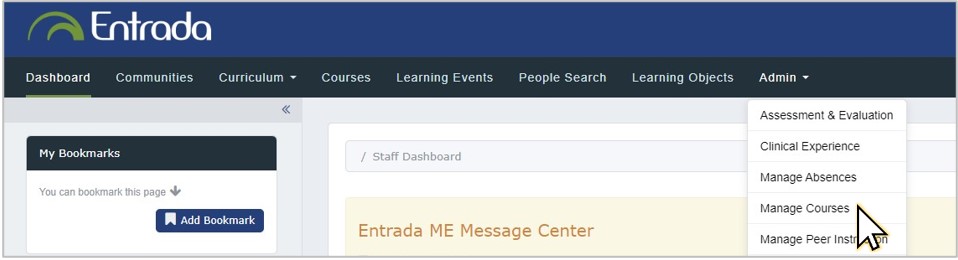
4. Go to Admin > Manage Courses.
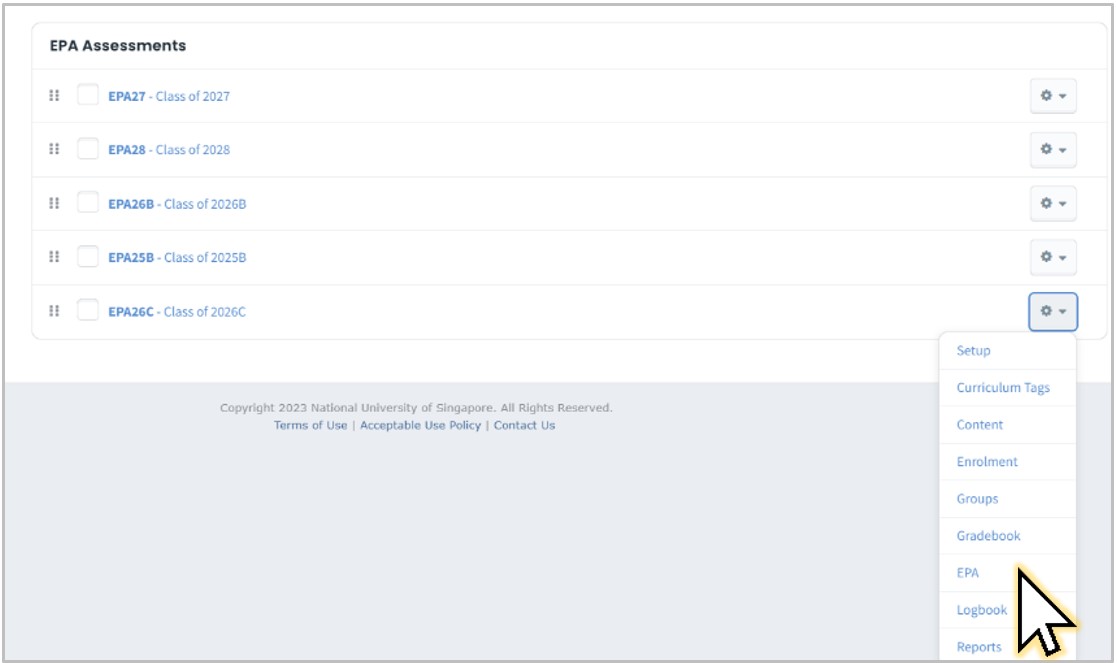
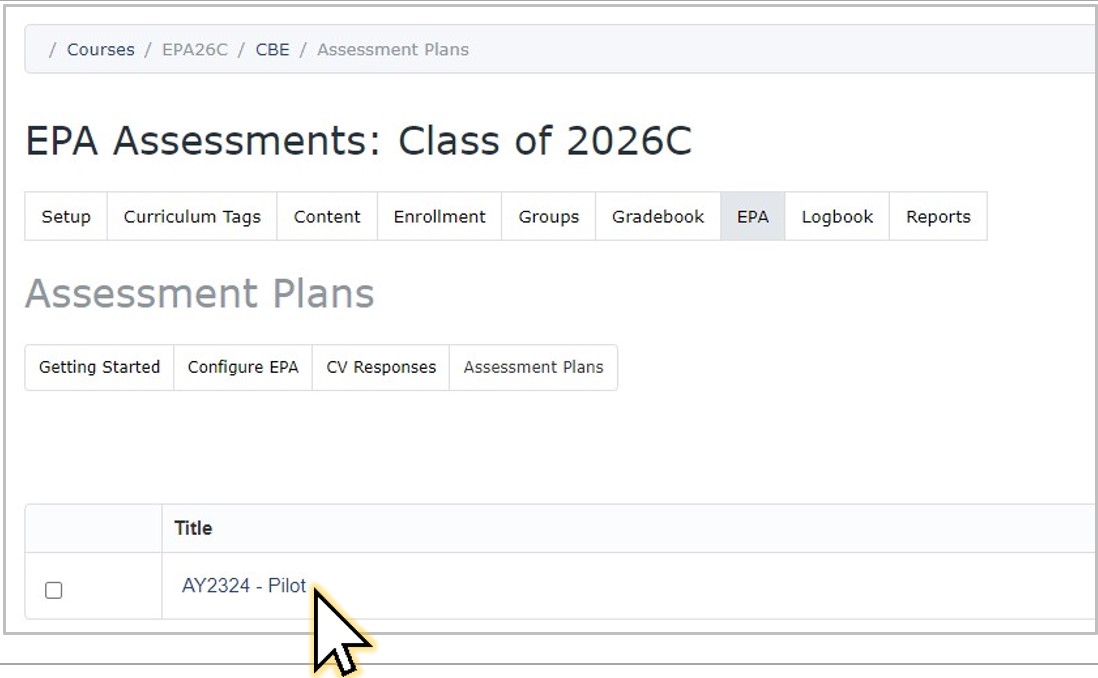
5. Navigate to the EPA course for the cohort you are setting assessment forms for, e.g. EPA26 for Class of 2026
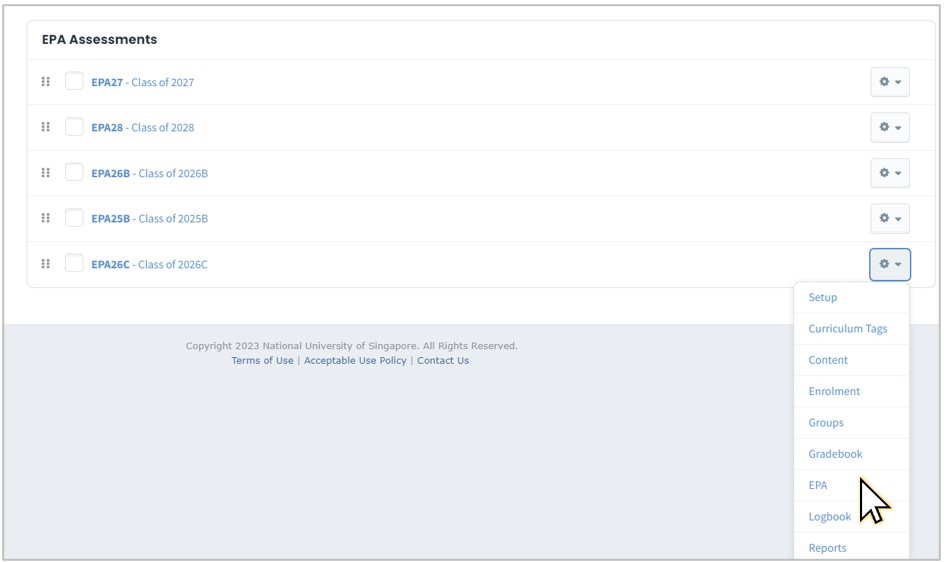 6. Click Assessment Plans.
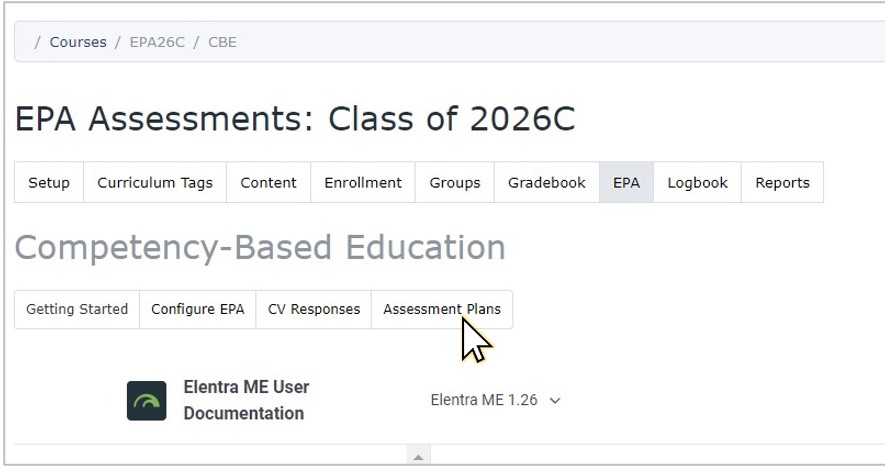
7. Select the AY folder, e.g. AY2324

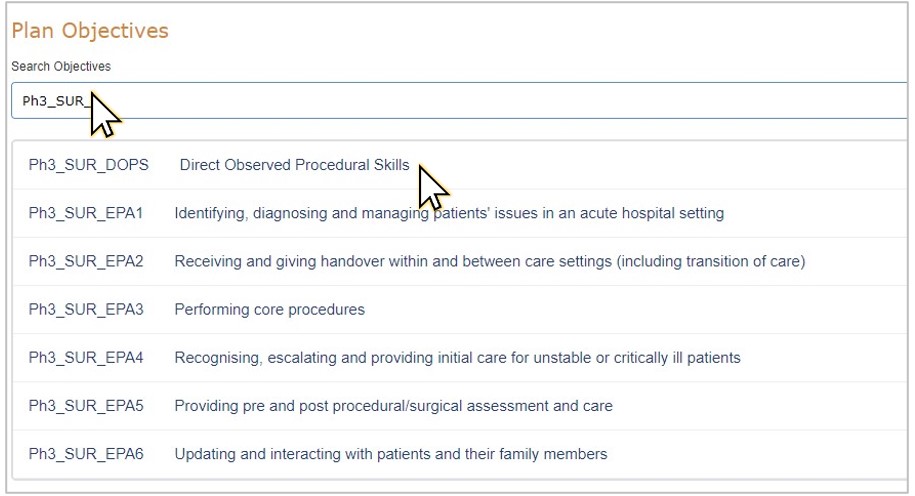
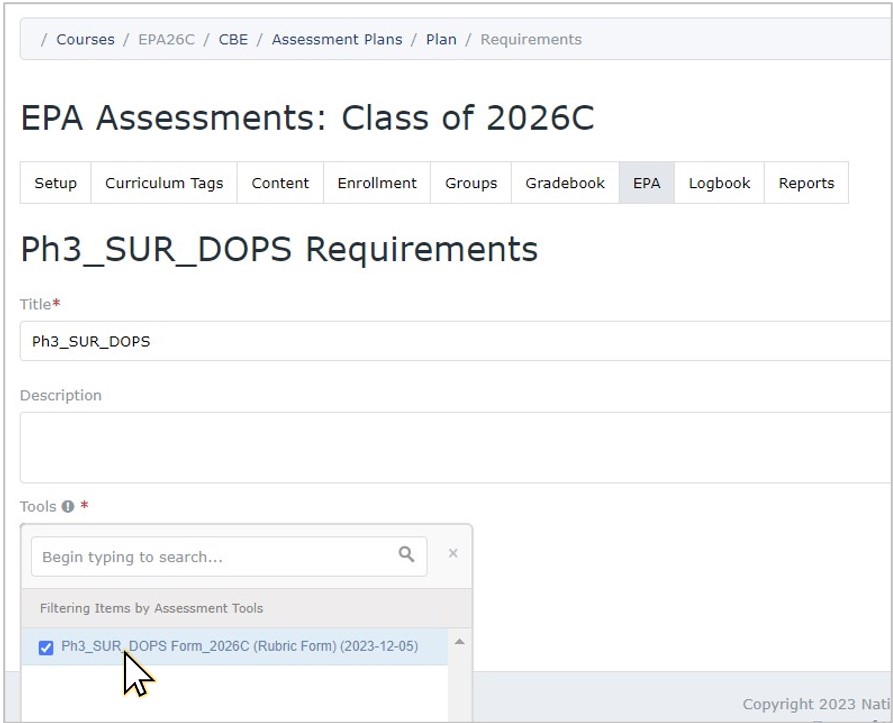
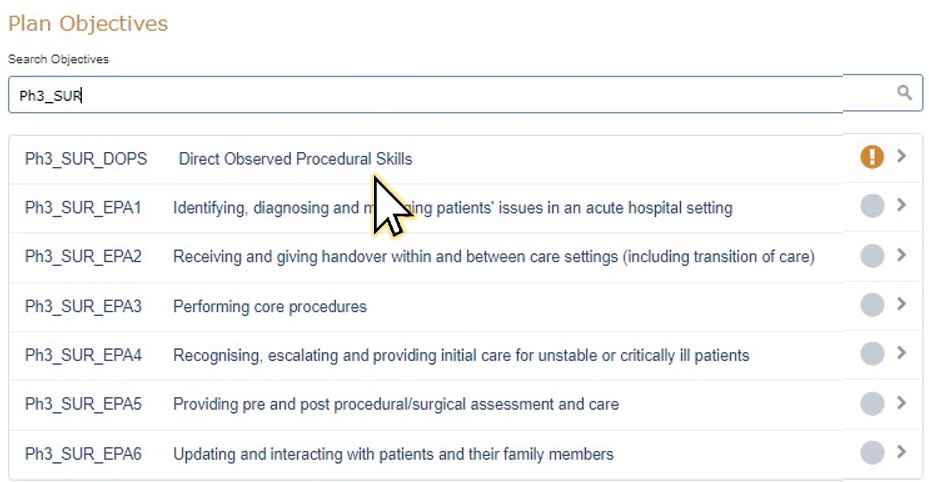
8. Search for the phase and posting you want to create assessment plans for, e.g. for Phase 3 Surgery, search for Ph3_SUR.
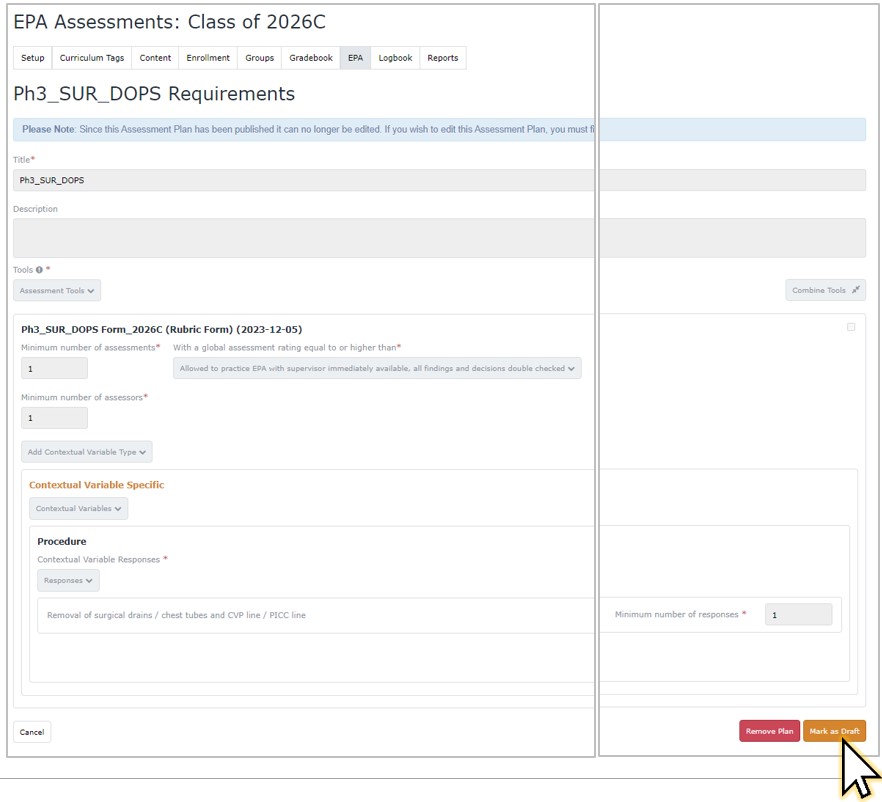
9. Then select the DOPS or EPA objective link. In this example, Ph3_SUR_DOPS is selected.
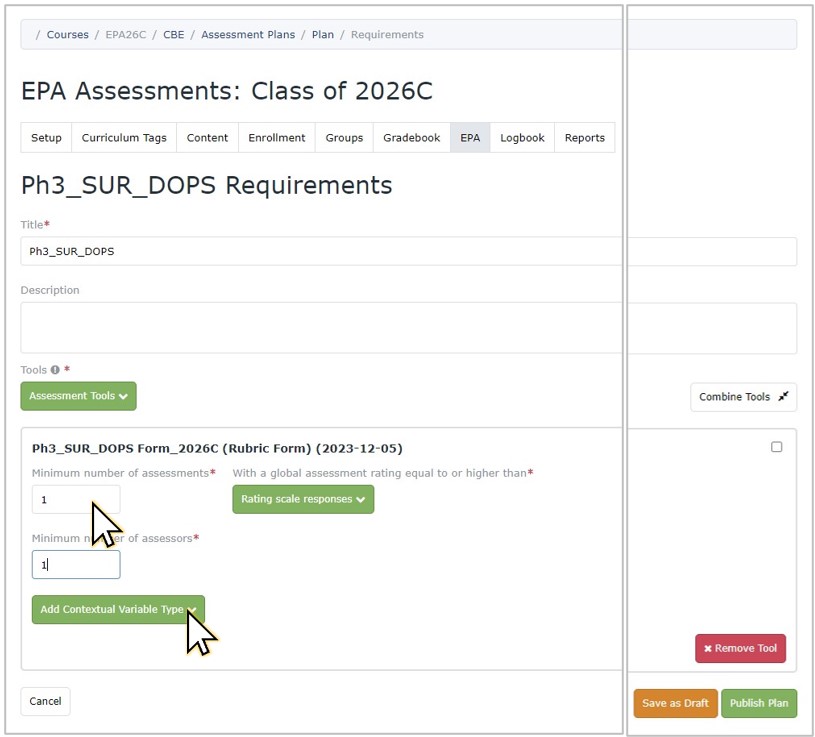
10. Enter title for this assessment plan. For simplicity, reuse the phase and posting name + EPA number, e.g. Ph3_SUR_DOPS, Ph3_SUR_EPA1, Ph3_SUR_EPA2, etc.
 11. Then click Assessment Tools.
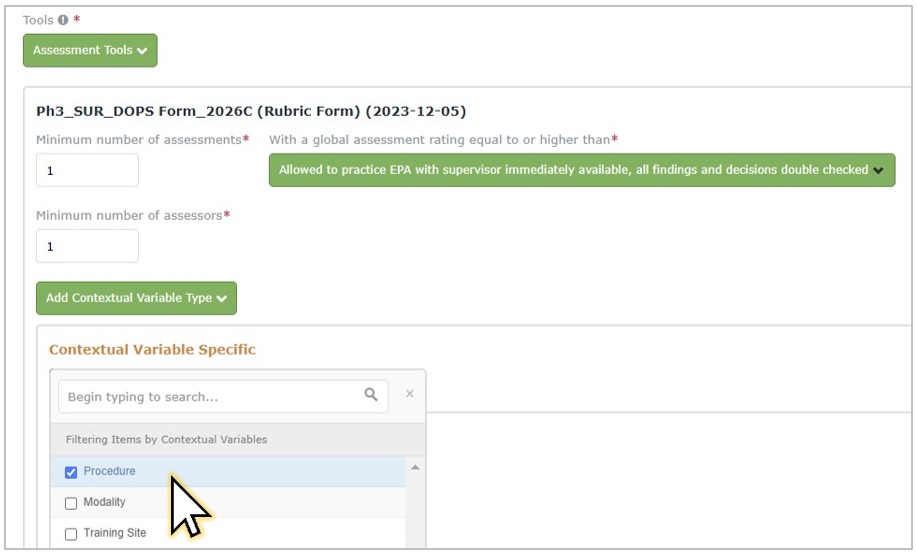
12. Select the assessment tool/form. This should correspond to the phase, posting and EPA objective you have selected earlier. E.g. Ph3_SUR_DOPS form.
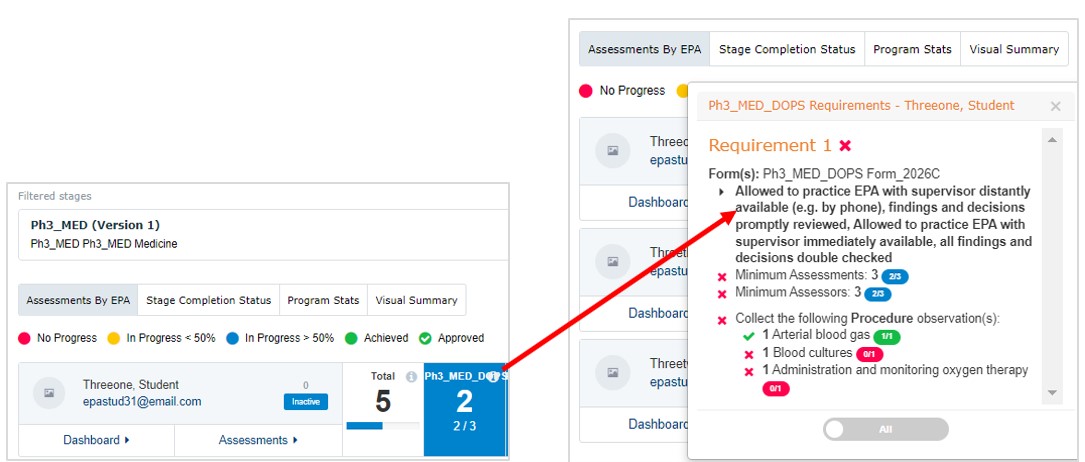
13. Enter the minimum number of assessment forms that students need to complete for this EPA. E.g. for Ph3_SUR_DOPS, you can enter 1.
14. Then, enter the minimum assessors allowed for the assessment forms. E.g. if student needs to complete minimum 2 assessments, you can indicate 2 here if you want these forms to be completed by 2 different assessors.
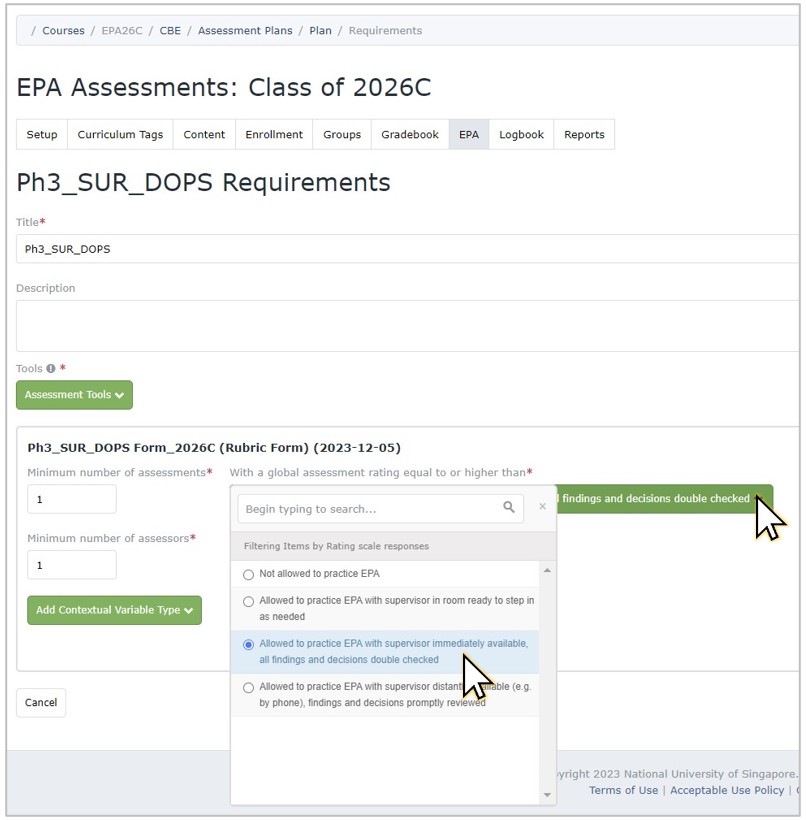
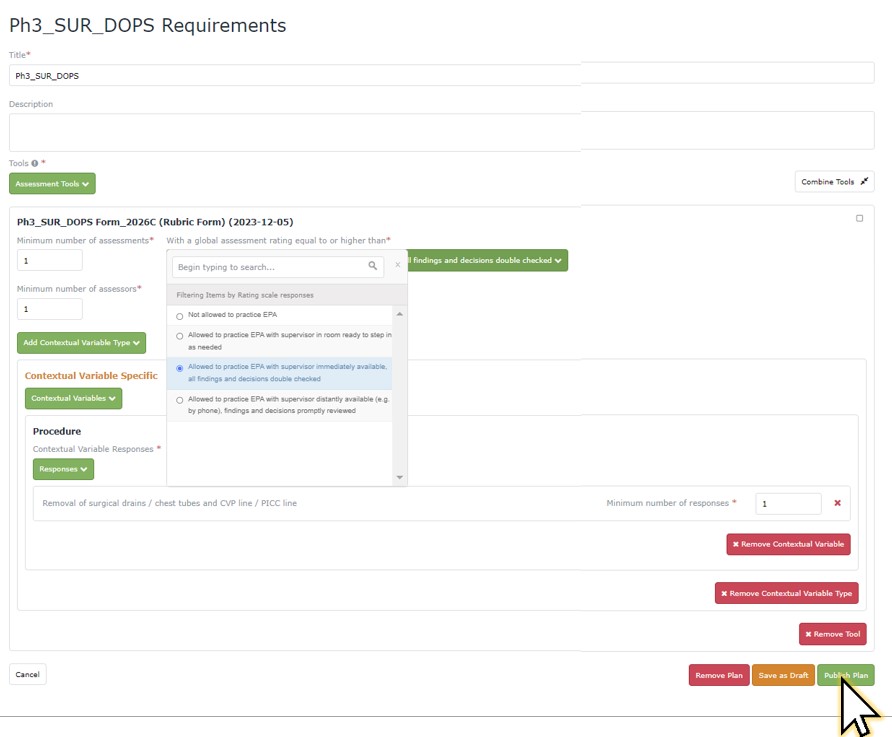
15. Next, select the level of entrustment expected for these student who are being assessed.
E.g. For Ph3_SUR_DOPS forms, the entrustment level is 3rd level: Allowed to practice EPA with supervisor immediately available, all findings and decisions double checked.
Implication: Only when the student has completed the minimum number of assessments and assessors, and is marked with this entrustment level, then the form will be reflected as completed (green) on the Program Dashboard.
 16. Only for DOPS forms: To indicate which procedure(s) students need to complete for this phase and posting, select Add Contextual Variable.
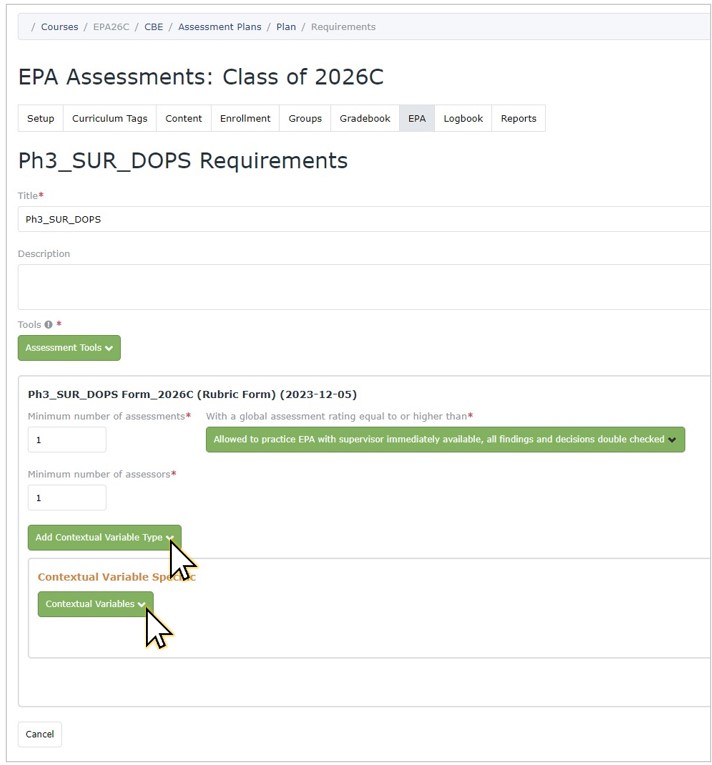
17. Select Procedure.
 18. Then search and select the procedure(s). E.g. for Ph3_SUR, select Removal of surgical drains / chest tubes and CVP line / PICC line, etc.
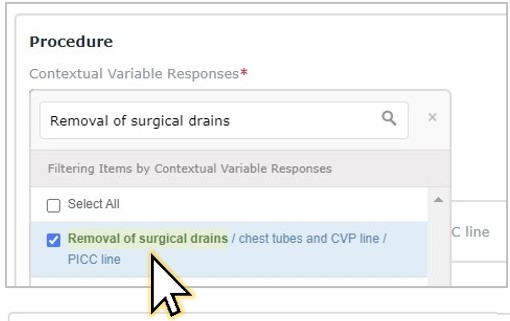
19. Enter the number of encounters where student needs to complete this procedure. E.g. 1.
Note: If students need to complete 2 DOPS forms and above, this can be set as 2 encounters for the same procedure, or 1 encounter for each of 2 procedures, etc.

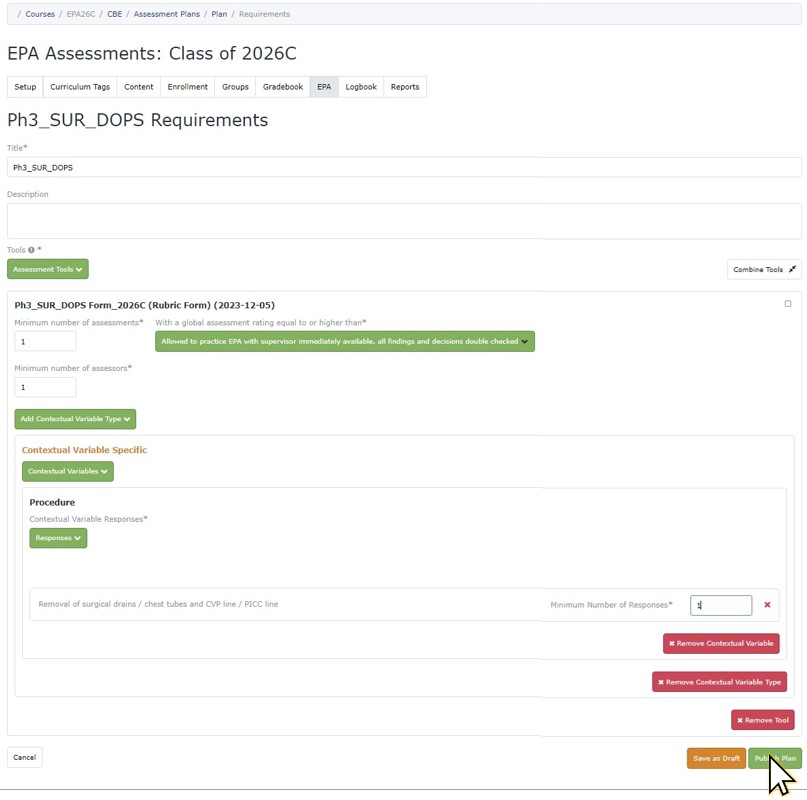
20. Once all requirements for the DOPS/EPA form have been set, click Publish Plan.
Students should now be able to see the assessment requirements for their respective phase/posting/EPA in their Learner Dashboard.
2. Update an Assessment Plan (where required)
Follow these steps to make changes to an assessment plan that has been published.
1. Go to Manage Courses > Course > Settings icon > EPA tab.
 2. Select the AY folder, e.g. AY2324.
3. Search for the phase and posting you want to update assessment plans for, e.g. for Phase 3 Surgery, search for Ph3_SUR.
4. Then select the DOPS or EPA objective link. In this example, Ph3_SUR_DOPs is selected for editing purpose.
 5. The Assessment plan is greyed out by default. To make changes, click Mark as Draft.
6. You will be redirected to the Assessment Plan folder. Search back objective edited, and the orange icon (!) should appear, instead of the green tick.
7. Select the DOPS/EPA link to make changes.
8. Update the numbers, entrustment level, and/or procedure, where required.
 9. Click Publish Plan to complete.
The requirements should be updated now in the Learner Dashboard and Program Dashboard views.
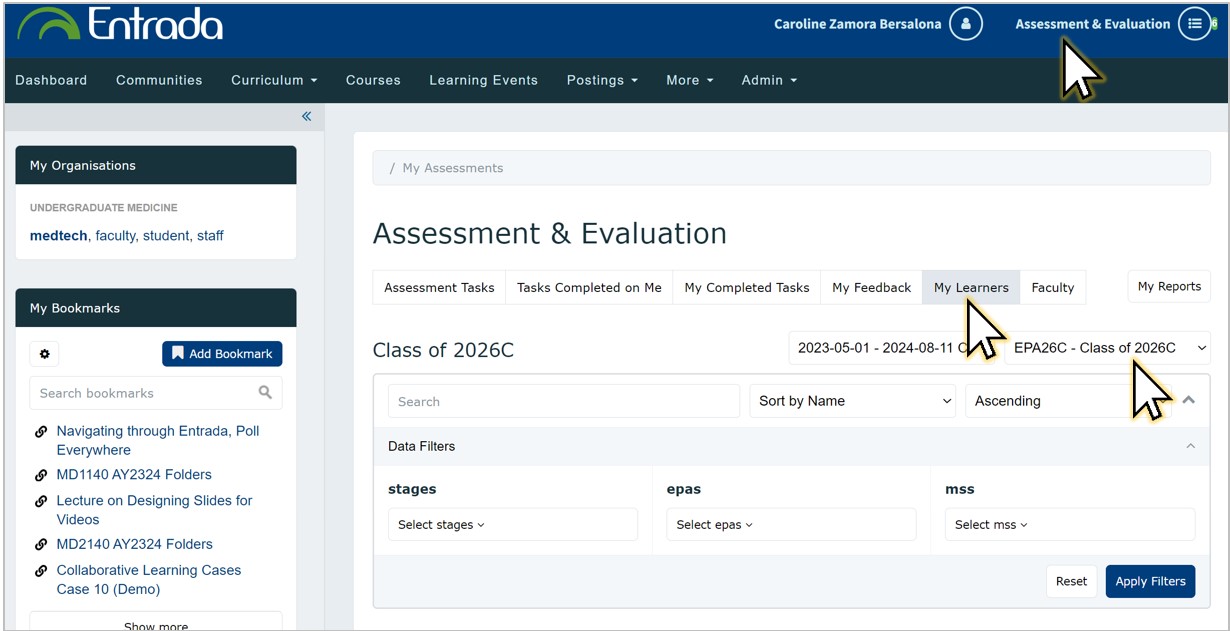
3. Monitor Progress of EPA Forms
Follow these steps to monitor completion of EPA forms.
1. Click Assessment & Evaluation > My Learners, the the EPA course for the student cohort, e.g. EPA26 for Class of 2026.
Note: If you are an administrator for just 1 posting, the drop-down will not be displayed.
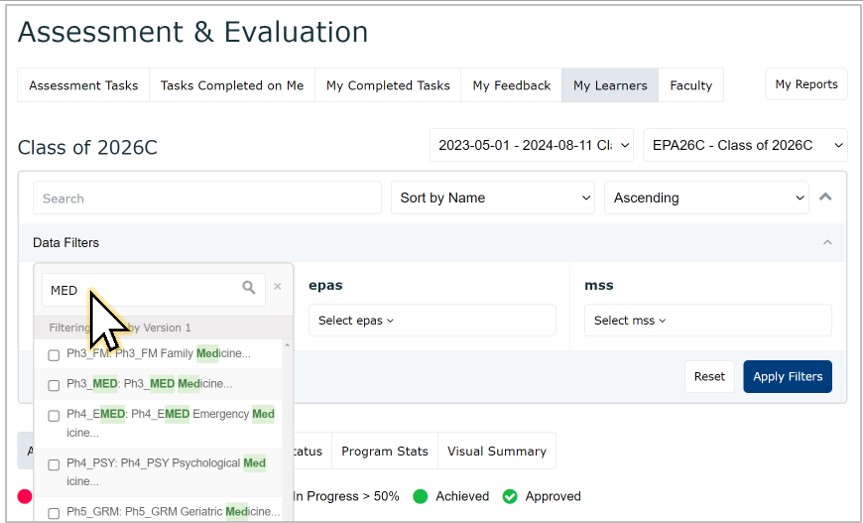
 2. To filter results by phase/posting, search and select the course code under Stages. For ease of search, enter Ph to search by phase, or the Posting code (e.g. SUR, EMED, MED, etc)
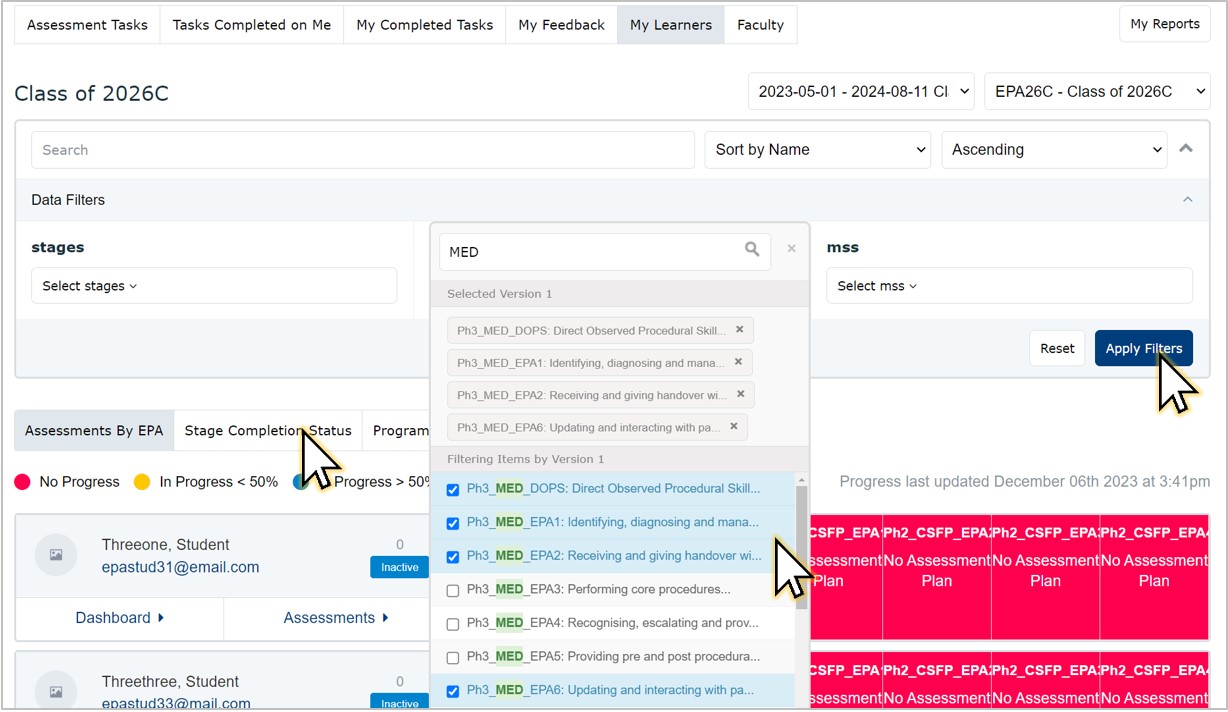
 3. Next, select the EPA(s) with assessment plans which you want to monitor. E.g. for Ph3_MED, you can select multiple EPAs as shown.
4. Then click Apply Filters.
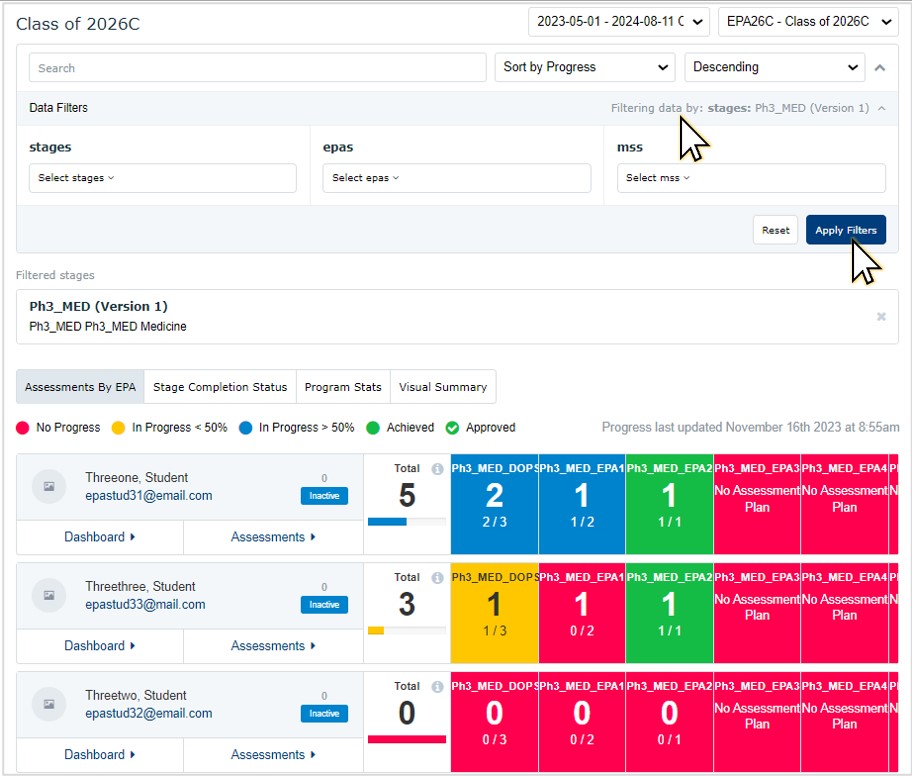
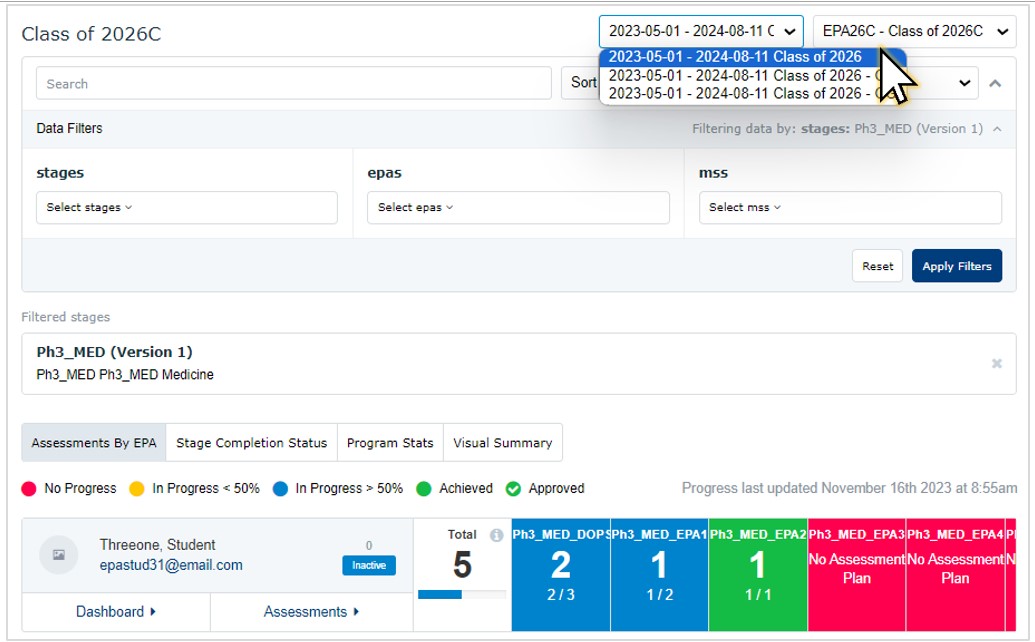
 5. The dashboard will display the EPAs results for the posting(s) selected. E.g., Ph3_MED as below:
- To sort by progress, name, or total assessments, use the filters + Apply Filters.
- To clear previous filters and select another posting, select Reset.
|
What do the numbers mean?
|
|
What do the colors mean?
|
6. To view the assessment plans/requirements per EPA, mouse over the DOPS/EPA and click on the (i) icon.
7. To filter results by curriculum period ad CG, OR entire cohort, select from the Curriculum drop-down on the upper right-hand corner and wait for the page to refresh (no need to click Apply Filter).
8. To switch view to entire cohort, select cohort, e.g., ...Class of 2026
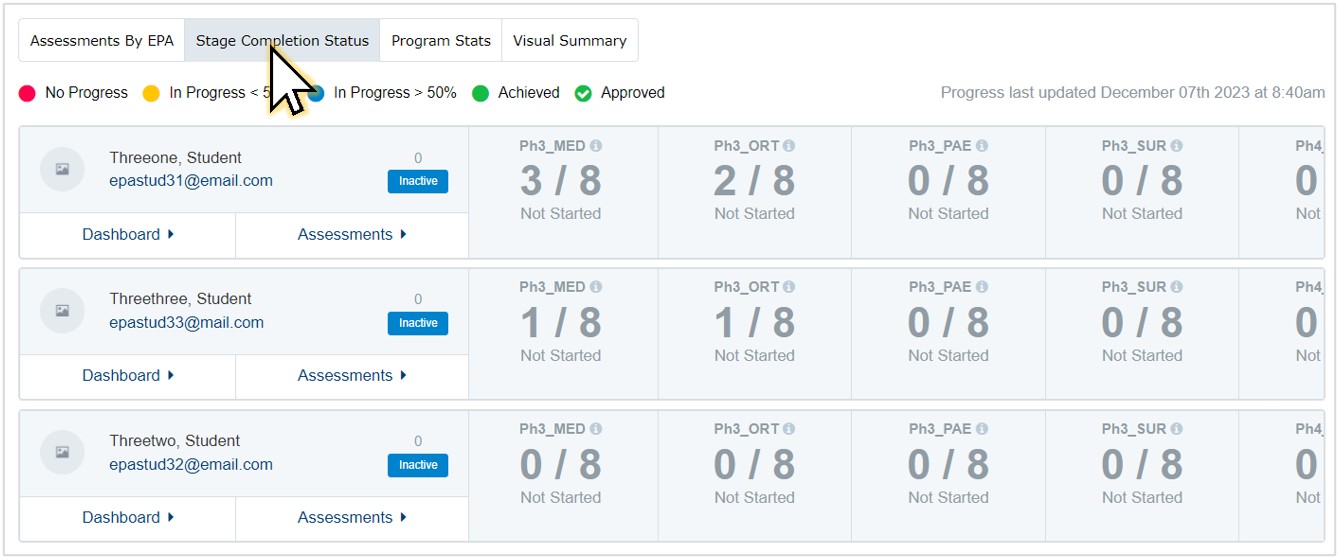
9. To view each learner's progress towards meeting all EPAs within a phase and posting, click Stage Completion Status.
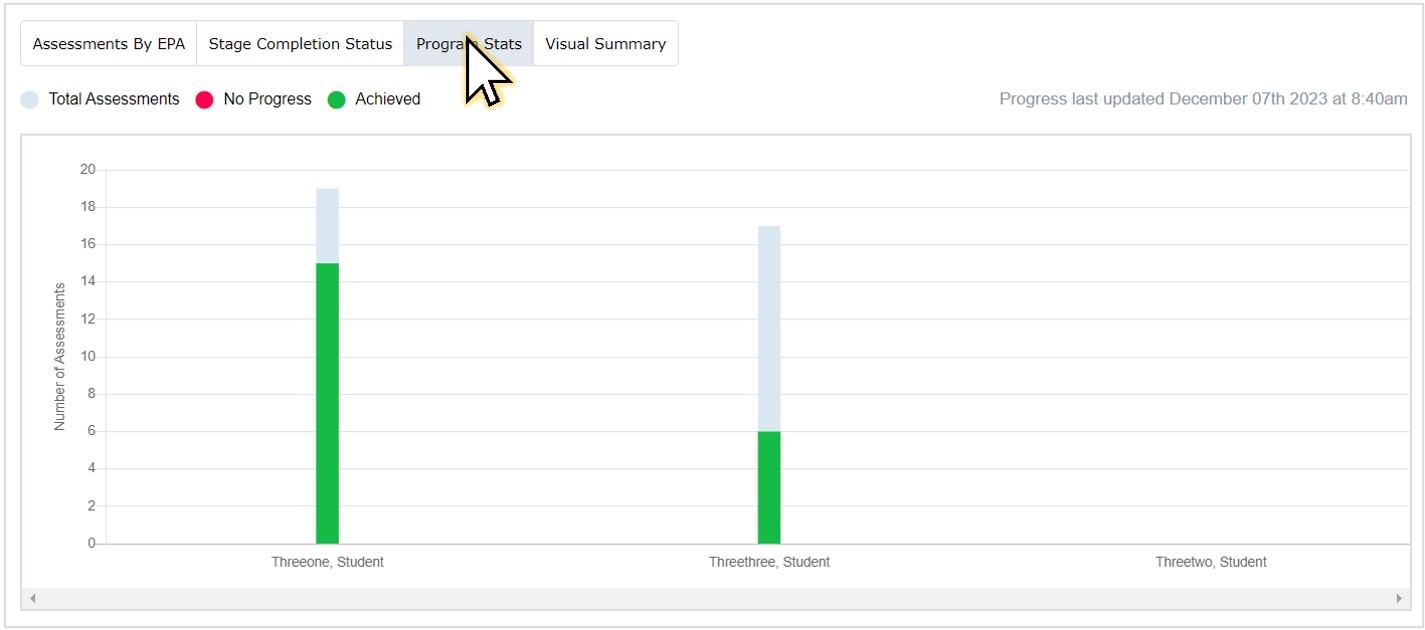
10. To view a bar graph depicting how many assessments have been completed on each student, highlighting the proportion that meet the plans, click Program Stats.
 11. To see the performance of all students in a phase and posting relative to each other, click Visual Summary.
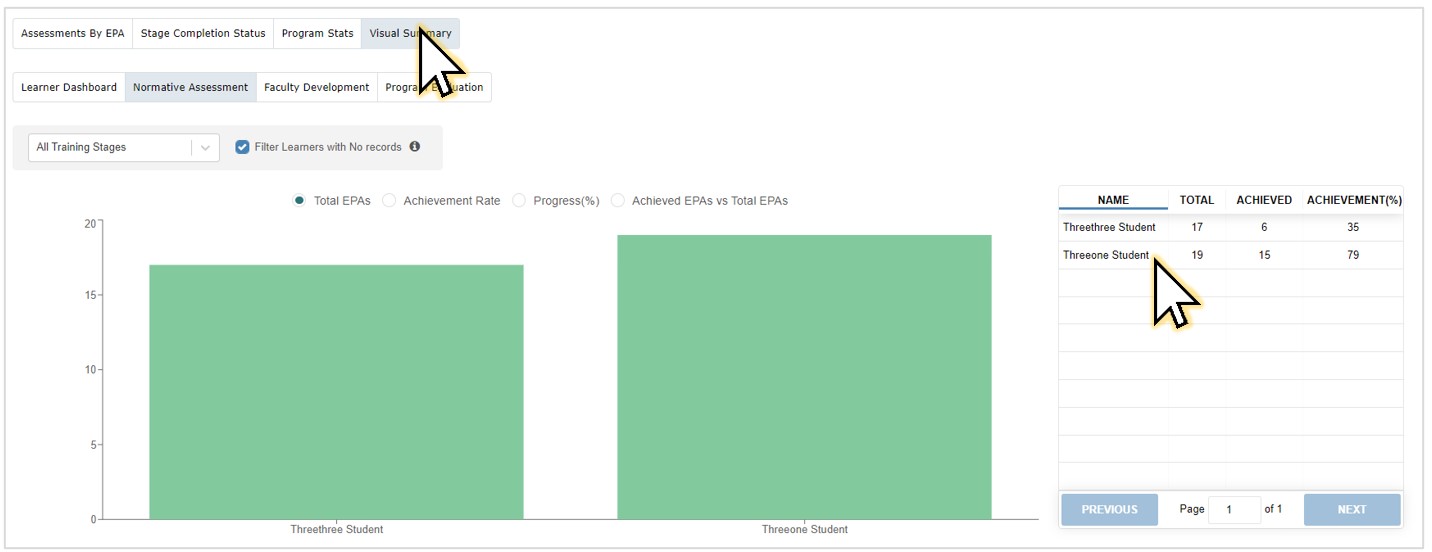
12. Select a student, then a phase and posting - to view the details on how many EPA forms are required, have been observed and achieved, and how many more to go.
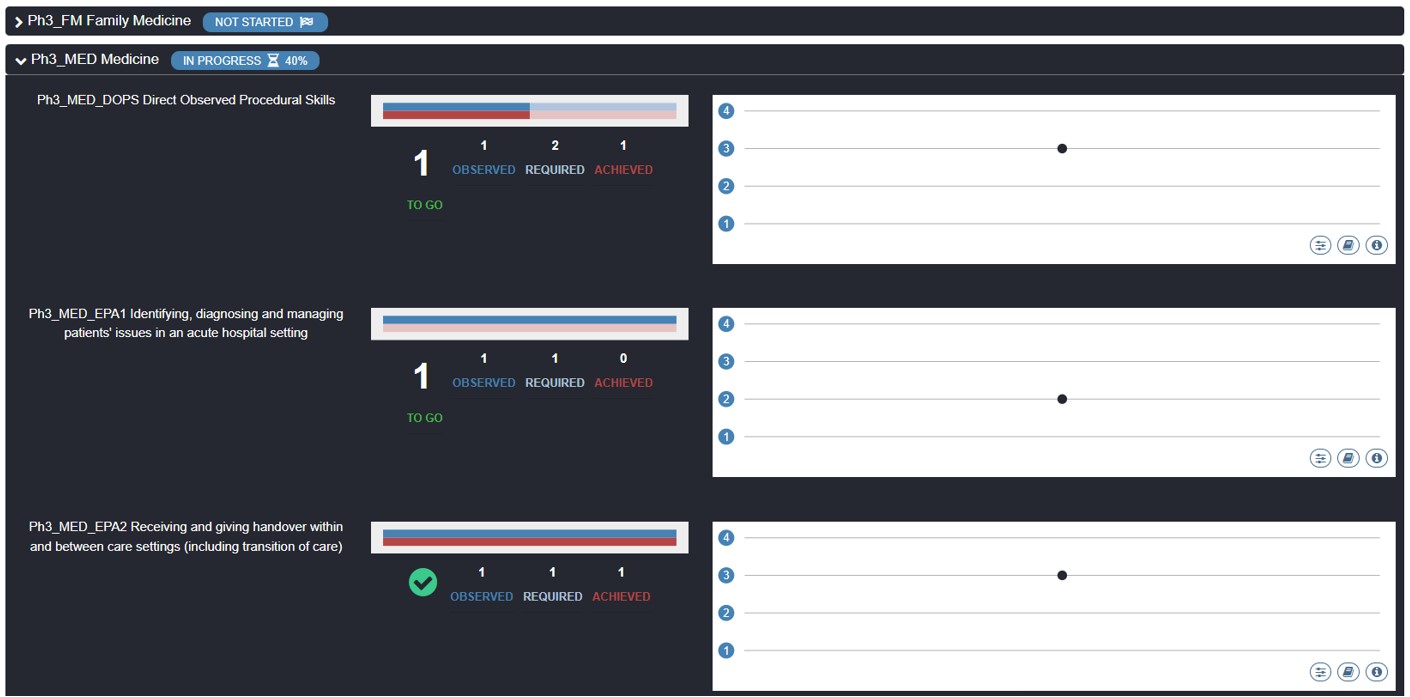
13. To view a tabulated summary of the forms, click on the book icon.

4. Download Assessment Reports
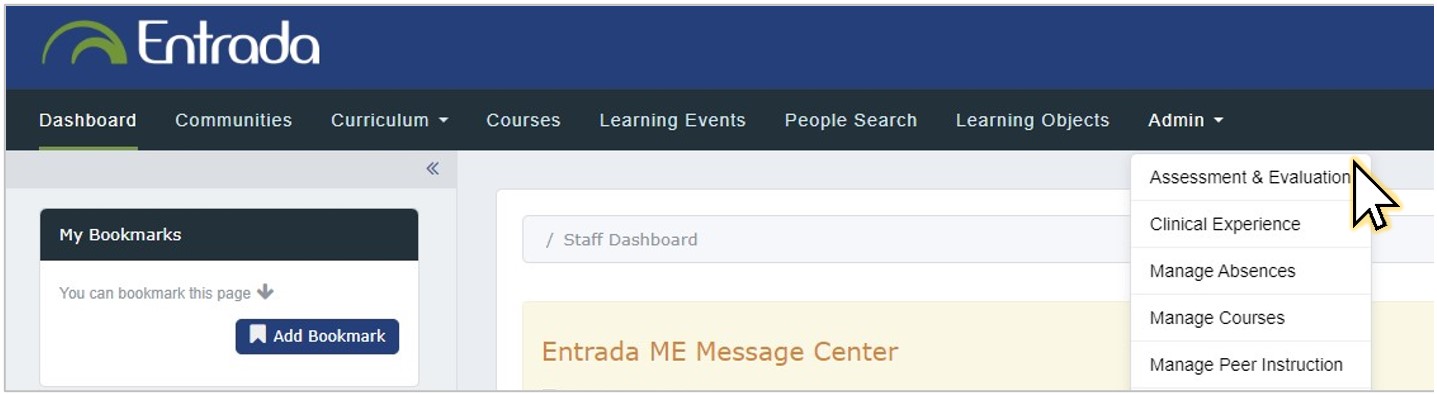
1. Go to Admin > Assessment & Evaluation.
 2. Go to Reports > Consolidated Reports.
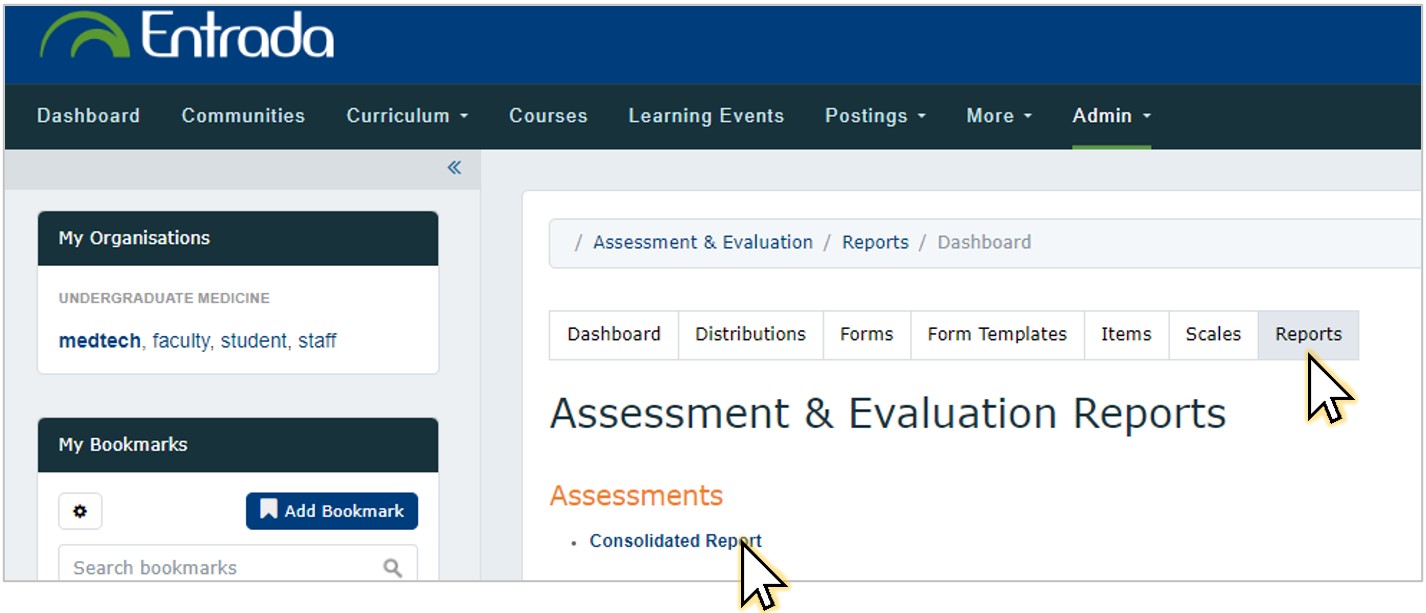
3. Complete all selections, and click Download CSV(s).
